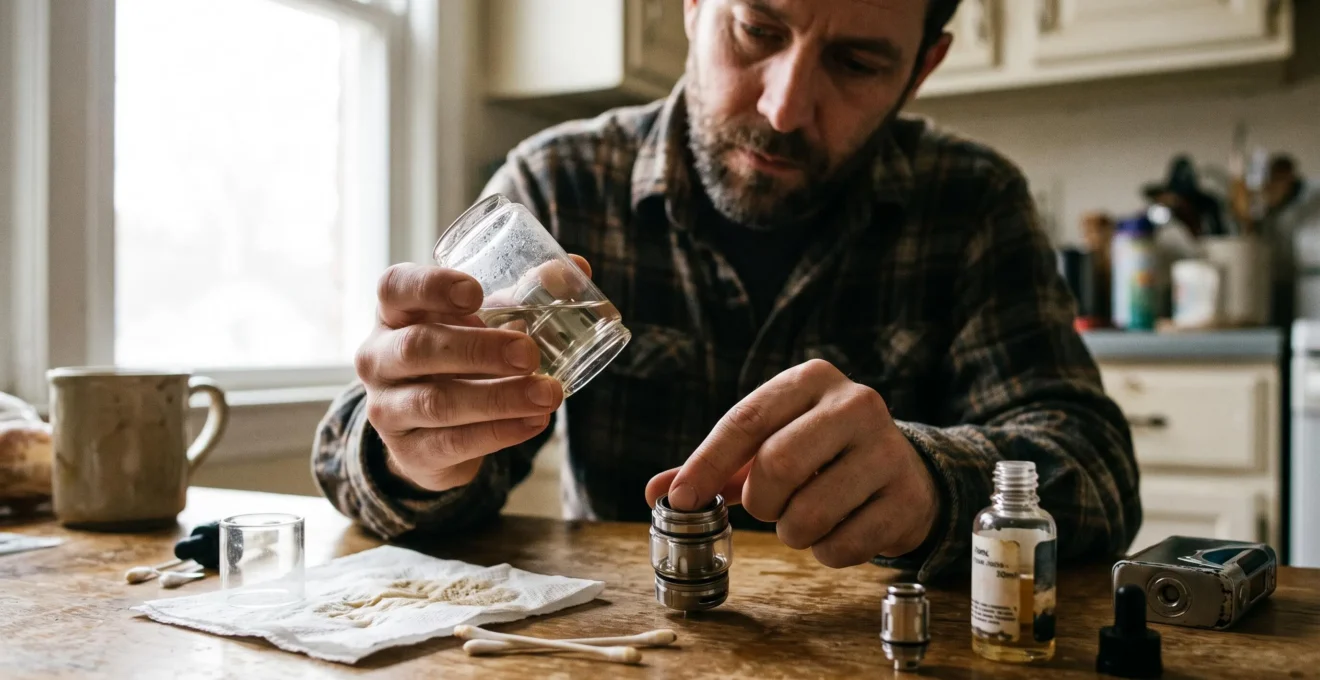
A glass vape reservoir does more than hold e-liquid. Its transparent walls make the remaining liquid visible, while its dimensions, seals and connection points determine whether the tank stays securely assembled. A small crack, displaced O-ring or incompatible replacement tube can affect the entire assembly even when the coil and device continue operating normally.
Everyday maintenance starts with a few practical checks: examine the glass for damage, look for moisture around the seals, confirm that the liquid level remains visible and make sure the tank components sit squarely together. When replacing or cleaning the reservoir, correct component fit matters more than tightening the assembly harder.
The appropriate maintenance method also depends on the tank model, coil design and e-liquid viscosity. A glass tube that fits physically is not necessarily compatible, and a leak around the reservoir does not always originate from the glass itself.
These distinctions help users identify problems before refilling, avoid unnecessary replacement parts and maintain a reservoir according to the equipment manufacturer’s instructions.
Essential Glass Vape Tank Checks
- Inspect the glass, sealing edges and O-rings for cracks, deformation or unexplained moisture before use.
- Use replacement glass made for the exact tank model, align it carefully and avoid excessive tightening.
- Match e-liquid viscosity and coil specifications, clean residue from seal grooves and check for leaks after reassembly.
- Why Can a Glass Vape Tank Crack Even Without Being Dropped?
- How Can You Replace Vape Tank Glass Without Pinching the O-Rings?
- Straight or Bubble Glass: Which Vape Reservoir Fits Your Daily Routine Better?
- Which Glass Tank Assembly Mistakes Cause E-Liquid to Leak Around the Reservoir?
- How Can You Clean a Glass Vape Reservoir Without Leaving Residue Around the Seals?
- Which E-Liquid Mismatches Can Cause Leaking, Flooding or Dry Hits?
- Why Can Repeated Overtightening Damage Vape Threads and Connections?
- How Can You Swap Interchangeable Vape Components Without Creating Compatibility Problems?
Why Can a Glass Vape Tank Crack Even Without Being Dropped?
A glass vape tank can crack without an obvious fall because the reservoir may experience pressure from misaligned components, excessive tightening or localized contact with hard objects. Rapid temperature changes may also stress certain glass materials. The likelihood depends on the tube’s composition, dimensions, existing damage and the way it is installed.
Glass tolerates some loads well but is vulnerable to concentrated mechanical stress. A tank pressed against a hard object inside a bag, for example, may experience pressure at a narrow contact point rather than across its entire surface. An incorrectly seated metal component can create another localized load near the tube’s edge.
Temperature resistance requires similar caution. Corning’s technical information on PYREX borosilicate glass describes the material’s resistance to thermal shock. However, those properties concern Corning’s documented glass products, not every vape reservoir. The composition and thermal tolerance of a particular tank must not be assumed from its appearance.
Avoid abrupt temperature changes where possible, including rinsing a recently heated glass tube directly under cold water. This is a precaution rather than evidence that normal repeated vaping necessarily fractures glass through thermal expansion.
For a daily inspection, rotate the empty or externally clean tank under a bright light. Pay particular attention to the lower edge, upper contact surface and areas partially obscured by metal fittings. Look for fine lines, chips or irregular reflections. Carefully inspect accessible edges without dragging bare fingers across suspected cracks.
Hairline damage can be difficult to distinguish from a sealing problem. As a possible diagnostic scenario, liquid appearing around the base might originate from a small glass defect rather than an O-ring. Visual inspection alone cannot reliably rule out every microscopic crack.
If cracking is suspected, stop using the tank and replace the glass with a compatible part. Do not attempt to repair a liquid reservoir with adhesive.
Once the glass has been checked, the next priority is ensuring that replacement tubes and their seals can be assembled without adding new stress.
How Can You Replace Vape Tank Glass Without Pinching the O-Rings?
Replace vape tank glass by identifying the original seal positions, cleaning the contact surfaces and sliding a model-compatible tube straight into place without forcing it. The O-rings must remain seated in their grooves rather than twisting, folding or becoming trapped between metal components. Inspect their position before refilling the tank.
Most glass tank assemblies rely on one or more seals where the reservoir meets the base and upper section. In its T18 II guidance, Innokin explains that many of its atomizers use two large O-rings surrounding the glass section. The precise arrangement nevertheless varies by device.
Before disassembly, photograph the original stack of components. Record the location of each seal and the orientation of any shaped or asymmetric parts. This makes reassembly easier when the old tube has been removed.
Use the manufacturer’s instructions for the specific tank, including any required steps for removing the coil or separating the base.
- Empty and disconnect the tank. Switch off the device, detach the tank and remove the remaining e-liquid before opening its glass assembly.
- Separate the components carefully. Remove the damaged tube without forcing the surrounding metal parts. Protect your hands from sharp edges and dispose of broken glass safely.
- Inspect the O-rings. Check for tears, flattening, swelling or displacement. Replace a damaged seal with the specified part.
- Clean the contact surfaces. Remove dried e-liquid and particles from the seal grooves, then allow the components to dry.
- Fit the replacement tube. Align the glass squarely over the seals, apply only the pressure required by the manufacturer’s assembly procedure and confirm that the seals remain evenly positioned.
- Check the assembled tank. Refill according to the instructions, wipe its exterior and observe the glass-to-base and upper junctions for moisture before use.
These steps follow the general seal-handling principles described in Innokin’s T18 II tank maintenance instructions. The manufacturer’s warning about excessive force is particularly relevant when a seal resists installation.
Original replacement glass is generally the more straightforward choice because it is identified for a particular tank. A generic tube may appear identical yet differ in wall thickness, height or edge geometry. Such differences can change how the seals contact the glass or prevent the assembly from closing correctly.
After refilling, leave the tank upright for a few minutes, dry any exterior moisture and inspect the junctions again. This observation can reveal an immediate sealing problem, although it cannot guarantee that a leak will never develop during use.
When several compatible glass shapes are offered, reservoir capacity and everyday handling become the next considerations.
Straight or Bubble Glass: Which Vape Reservoir Fits Your Daily Routine Better?
Straight glass is usually the more compact option, while bubble glass can provide additional liquid capacity when the tank is designed to accept it. The better choice depends on refill frequency, available space, liquid-level visibility and replacement-part availability. Neither shape is automatically more durable or universally compatible.
A straight reservoir maintains a relatively consistent diameter along its height. Its narrower profile can be convenient when carrying a device, placing it in a protective case or checking how much liquid remains.
Bubble glass expands outward through part of its body, creating additional internal volume on compatible designs. This can reduce the number of refills required during a given period, but it also increases the tank’s maximum external width.
Capacity should be taken from the exact product specification rather than estimated from its silhouette. Two reservoirs that look similar may have different usable volumes because of internal chimney dimensions, filling limits or wall geometry.
The comparison below highlights practical differences rather than claiming that one format performs better in every device.
| Daily consideration | Straight glass | Bubble glass |
|---|---|---|
| Liquid capacity | Typically lower within the same compatible tank family | May provide increased capacity |
| External profile | Narrower, more uniform shape | Wider around the expanded section |
| Liquid-level inspection | Generally straightforward when the glass is exposed | Curvature and reflections may complicate the view |
| Frequent flavor changes | A smaller capacity may mean less remaining liquid to empty | A larger fill may leave more liquid to remove |
| Replacement availability | Must be confirmed for the exact model | Must be confirmed for the exact model |
| Compatibility | Requires the specified dimensions and seals | Requires the specified dimensions, seals and clearance |
Transparent glass makes liquid storage easier to monitor, but the appearance of the liquid matters. A clear e-liquid is often easier to distinguish from an empty region than a very dark liquid, particularly where curvature, condensation or reflections obscure the interior. This is a practical visibility consideration, not a measured performance advantage established for every glass shape.
Users who refill frequently may appreciate the extra capacity of bubble glass. Users who change flavors often, prefer a slimmer device or routinely empty the tank for cleaning may find straight glass more convenient.
Neither format should be purchased solely because its diameter looks correct. The tube’s height, end geometry and compatibility with the upper tank section must also match.
Once the correct shape is selected, careful assembly is essential because a compatible reservoir can still leak if its seals or contact surfaces are incorrectly positioned.
Which Glass Tank Assembly Mistakes Cause E-Liquid to Leak Around the Reservoir?
Leaks around a glass vape reservoir commonly result from displaced O-rings, contaminated sealing surfaces, uneven glass alignment or incompatible replacement components. These faults create gaps where liquid can escape. However, liquid appearing near the tank base may also originate from the airflow system or coil chamber rather than the glass seal itself.
The first diagnostic step is to locate where moisture initially appears. After safely wiping the exterior of a filled tank, inspect the glass-to-metal junctions and airflow openings separately. A wet surface alone does not identify the precise origin.
Common assembly problems include:
- Twisted or displaced O-ring: The seal no longer makes uniform contact with the glass.
- Angled glass installation: One side of the tube may press more heavily into its seal than the other.
- Incorrect tube dimensions: A replacement may alter the intended seal compression or prevent the metal sections from seating correctly.
- Dried e-liquid beneath a seal: Residue can interrupt continuous contact between the O-ring and its seating surface.
- Damaged sealing edge: A chip or irregularity may prevent the glass from sealing properly.
A reservoir-junction leak often presents as moisture collecting around the upper or lower edge of the glass. By contrast, liquid emerging from airflow openings, bubbling during operation or entering the central chimney suggests that the coil, wicking system or internal airflow path may need attention.
These symptoms are useful clues rather than definitive tests. Liquid can migrate across the outside of a tank, making the visible drip appear some distance from its origin.
A tank stored full in a warm environment may also experience changes in liquid behavior and internal pressure conditions. Temperature can influence leakage, although it does not mean that normal warmth necessarily overwhelms an otherwise correctly assembled seal.
Five Checks Before Returning a Reassembled Tank to Use
- Inspect the replacement tube under good lighting and confirm that its edges have no visible chips or cracks.
- Check each accessible O-ring and confirm that it sits continuously in its intended groove, without twisting or visible damage.
- Align the glass and upper and lower tank sections; confirm visually that the assembled reservoir sits squarely.
- Refill according to the device instructions, wipe the exterior dry and identify any moisture appearing at a specific junction.
- Observe the upright tank before use and record whether the glass joint, airflow opening or both remain dry.
If moisture persists after the seals have been checked, do not tighten the assembly repeatedly in an attempt to stop it. Remove the tank from service until the damaged or incompatible part is identified.
Preventing those faults also requires cleaning the areas that are easiest to overlook: the grooves and contact surfaces beneath the seals.
How Can You Clean a Glass Vape Reservoir Without Leaving Residue Around the Seals?
Clean a glass vape reservoir by disassembling its washable components, removing accessible O-rings where the manufacturer permits and rinsing away e-liquid residue with lukewarm water. Gently clean the seal grooves, then dry all parts thoroughly before reassembly. Do not expose coils, electronics or seals to cleaning methods their manufacturer does not approve.
The interior glass wall is usually easy to inspect, but residue can accumulate along narrow metal edges and beneath sealing rings. Sweet or heavily flavored liquids may leave deposits that remain visible after a quick rinse.
A contaminated groove can interfere with the contact between the seal and its seating surface. Even when the glass looks clean, residue trapped under an O-ring may contribute to imperfect sealing.
For routine maintenance, begin by emptying the tank and separating the components according to the model’s instructions. Rinse the washable glass and compatible non-electrical parts under a gentle stream of lukewarm water. A soft, clean cloth or non-abrasive cleaning aid can help remove deposits without scratching the reservoir.
Where removable O-rings are provided, inspect both the seals and the grooves they occupy. Remove deposits gently rather than scraping the surfaces with a metal tool. Do not stretch an O-ring unnecessarily or reinstall one that has become visibly torn or distorted.
A useful final inspection is to examine the dry groove under good lighting. Any remaining sticky or glossy deposit that is not part of the surface finish deserves another gentle cleaning pass.
Complete drying matters. Allow water to leave the grooves, threads and other recesses before reinstalling seals and reassembling the tank. Avoid applying excessive heat to accelerate drying.
Alcohol and stronger solvents should not be assumed safe for every gasket material or tank finish. Use them only when the equipment manufacturer explicitly approves the cleaning method.
Routine cleaning frequency depends on use, liquid composition and residue accumulation; there is no universally established weekly interval for all tanks. Cleaning during a flavor change may need to be more thorough than wiping away exterior moisture because residual flavor can remain in the coil or other liquid-contact components.
If a persistent taste remains after cleaning the reservoir, inspect the coil separately. Cleaning the glass does not necessarily remove flavors retained by the wick.
A clean reservoir provides a better basis for troubleshooting, but liquid behavior also depends on the coil and the composition of the e-liquid being used.
Which E-Liquid Mismatches Can Cause Leaking, Flooding or Dry Hits?
E-liquid mismatches occur when the liquid’s viscosity does not suit the coil’s wicking design. Thin liquids may flow too readily through some large wicking openings, contributing to flooding or leakage, while thick liquids may replenish a restrictive coil too slowly and contribute to dry hits. The correct match depends primarily on the coil and manufacturer specifications, not the glass reservoir alone.
Propylene glycol (PG) is comparatively fluid, whereas vegetable glycerine (VG) is thicker. Their proportions affect how liquid travels through the wick and into the heating area.
Innokin’s explanation of PG and VG in e-liquids identifies blends containing 70% VG or more as generally high-VG liquids and emphasizes the need for a suitable wicking system.
The distinction matters because different coils are built with different liquid-feed openings and intended operating conditions. The same bottle of e-liquid may work in one atomizer and perform poorly in another.
As a general orientation, the following combinations illustrate common design relationships. They are not universal compatibility specifications.
| Tank and coil design | Common liquid starting point | What to verify |
|---|---|---|
| Low-power MTL device with small wicking ports | Balanced or comparatively PG-rich blends, often around 50VG/50PG | The manufacturer’s permitted PG/VG composition and coil design |
| MTL tank supporting a wider liquid range | 50VG/50PG or another explicitly supported ratio | Whether higher-VG blends are approved for the installed coil |
| High-power sub-ohm tank with substantial liquid-feed openings | Frequently higher-VG blends, including 70VG/30PG where specified | Coil compatibility, recommended wattage and wicking behavior |
| Rebuildable atomizer | Varies with the build and wick configuration | Liquid-flow characteristics and the specific assembly’s operating limits |
The manufacturer remains the deciding reference. For example, Innokin’s documented T18 II guidance includes compatibility with both 50VG/50PG and 70VG/30PG liquids, illustrating why a rigid rule based only on the term MTL would be misleading.
Temperature adds another variable. Cooler conditions generally increase a liquid’s viscosity, and VG-rich blends can become noticeably thicker. A liquid that normally feeds adequately may therefore wick less readily in cold surroundings. This is a plausible technical consideration, not a quantified prediction of dry-hit frequency for a particular tank.
Repeated rapid puffs can also outpace the wick’s ability to absorb more e-liquid. A dry hit should not automatically be blamed on glass capacity or the liquid ratio.
Before changing liquids, check the coil’s designated power range, the permitted viscosity range and any manufacturer guidance on preparing a new coil. Innokin recommends allowing at least five minutes after filling and priming a new coil in its T18 II instructions.
If the liquid and coil are correctly matched but leaks continue around the tank hardware, inspect the condition of the threads and connections before tightening anything further.
Why Can Repeated Overtightening Damage Vape Threads and Connections?
Repeated overtightening can damage vape tank connections by applying more force than their threads and seals are designed to accept. Excessive torque may deform components, compress O-rings unevenly or place unnecessary stress on the glass assembly. Damage is not inevitable after one firm closure, but forcing parts together increases the risk of mechanical problems.
Threads are intended to position and secure mating components. Once the relevant sealing surfaces have reached their designed position, additional rotation may increase mechanical loading without improving the seal.
In a glass tank, that force can be transmitted through the metal base, upper section and surrounding seals. A distorted O-ring may no longer return to its intended shape, while damaged threads can make subsequent assembly less predictable.
The most practical tightening reference is the manufacturer’s procedure. Where no tool or additional tightening step is specified, parts intended for hand assembly should generally be joined gently and without forcing them past their natural seating point.
A fixed extra quarter-turn is not a universal rule. Different tank designs, thread pitches and sealing arrangements require different amounts of rotation, and applying an arbitrary extra turn can be counterproductive.
During inspection, look for:
- Visible damage, flattening or irregularities along the thread edges.
- Unexpected resistance or rough movement while threading components together.
- A connection that no longer seats evenly.
- Repeated seal displacement after otherwise correct assembly.
- Leaks that persist despite clean, correctly positioned and undamaged O-rings.
Never force a component that begins threading at an angle. Cross-threading can damage a connection before the tank reaches its assembled position.
When a tank has been repeatedly overtightened and continues leaking, replacing another O-ring may not solve the underlying problem. The base, upper fitting or mating component may require inspection or replacement with an approved part.
Progressive thread wear and glass cracking are possible consequences of excessive mechanical loading, but the supplied technical documentation does not establish how frequently overtightening directly causes spontaneous glass fractures.
Long-term reliability also depends on whether replacement parts were designed to connect in the first place, making compatibility checks the final step in responsible reservoir maintenance.
Key Takeaways Before Replacing Any Component
- Matching appearance is insufficient: confirm the exact tank model, part geometry and officially supported component family.
- A replacement must satisfy mechanical requirements, while coils must also satisfy the device’s electrical operating limits.
- Check fit and sealing before filling; then inspect the completed assembly before returning it to normal use.
How Can You Swap Interchangeable Vape Components Without Creating Compatibility Problems?
Swap vape components safely by checking three separate compatibility requirements: the mechanical connection, the physical dimensions and, for coils or other electrical parts, the device’s operating specifications. A matching thread or similar-looking glass tube does not establish complete compatibility. Use manufacturer-approved combinations and inspect the assembled tank before operation.
The first compatibility level concerns connections. Thread types, drip-tip fittings and tank-base interfaces must match the component’s intended design. A connection that can be started by hand is not necessarily safe or correctly fitted.
The second level concerns physical geometry. Replacement glass must have the appropriate height, diameter, edge shape and sealing interfaces. The correct relationship between the glass, O-rings and central chimney is essential even when two tubes look interchangeable.
Tank width relative to the mod also deserves attention. A reservoir or base that overhangs the device may be more exposed to accidental contact. Overhang alone, however, does not prove electrical incompatibility; the manufacturer must confirm that the complete combination is supported.
The third level applies to coils and powered components. The device must support the coil’s resistance and operating power range, while the tank must physically accept the particular coil variant.
Manufacturer specifications illustrate why names alone can mislead. Aspire’s Huracan documentation identifies supported BP meshed and BP Pro meshed coil variants while excluding other variants within the broader BP family. It also specifies different operating wattage ranges for individual compatible coils.
For the named Huracan models, the published examples include:
| Coil | Specified operating range | Compatibility consideration |
|---|---|---|
| 0.15-ohm BP meshed | 60–80 W | Use only with a supported tank and capable mod |
| 0.17-ohm BP meshed | 45–55 W | Confirm the exact coil variant |
| 0.3-ohm BP meshed | 30–40 W | Follow its own rated operating range |
These figures apply to the documented Aspire Huracan components, not other coils with similar resistance values. The manufacturer’s supplied bubble glass and defined coil list also show that component compatibility is a model-specific matter.
Some component groups are deliberately standardized or shared. For example, a standard 510 drip tip can fit devices designed for that mouthpiece connection, while certain coil families support multiple explicitly listed tanks. Even then, confirm dimensions and the manufacturer’s compatibility information rather than relying solely on the component name.
Glass from a different tank generation, an unfamiliar base or an unverified coil substitute is more uncertain. A physically imperfect fit may lead to leakage, misalignment or connection problems.
After changing a component, first examine the dry assembly without e-liquid. Confirm that parts seat correctly, threads engage smoothly and no O-ring is visibly displaced. Then refill according to the device instructions, wipe the exterior and look for moisture at the relevant junctions before operation.
Do not power an incompatible or incorrectly assembled coil to test whether it works. Electrical compatibility should be confirmed from the specifications before use.
For the next reservoir replacement, identify the exact tank and coil models, obtain the documented compatible components and complete a visual fit-and-leak inspection before putting the device back into daily use.
Can a vape tank still be used if the glass has a very small chip?
Damaged reservoir glass should be replaced rather than used. Even a small chip can affect a sealing edge or indicate damage that is difficult to assess visually. Stop using the tank, empty it safely and obtain compatible replacement glass. Do not attempt to seal the defect with glue.
Should O-rings be replaced every time the glass is removed?
Not necessarily. Inspect reusable O-rings for cuts, flattening, deformation, swelling and deterioration. Replace damaged seals or follow any replacement interval specified by the manufacturer. A correctly sized, undamaged seal may be reusable when the equipment instructions permit it.
Why does the e-liquid level sometimes look uneven inside a bubble tank?
Curved glass can create reflections and optical distortion, while device tilt and liquid adhering to the walls may affect the apparent level. Place the tank upright on a stable surface and inspect it under suitable lighting. If the level remains difficult to judge, rely on the tank’s specified filling procedure rather than estimating capacity from its shape alone.
Can a clean glass tank retain the taste of a previous e-liquid?
Yes. Residual flavor can remain in the coil wick or other liquid-contact components even after the glass has been washed. Cleaning the removable tank parts may reduce flavor carryover, but a heavily saturated or deteriorated coil may need replacement according to the manufacturer’s instructions.
How should spare vape tank glass be stored?
Keep replacement glass clean, dry and protected from hard objects or concentrated pressure. Retain its original packaging or use a suitable protective container, and label it with the compatible tank model. Inspect it for chips or cracks before installation, even if it has not previously been used.