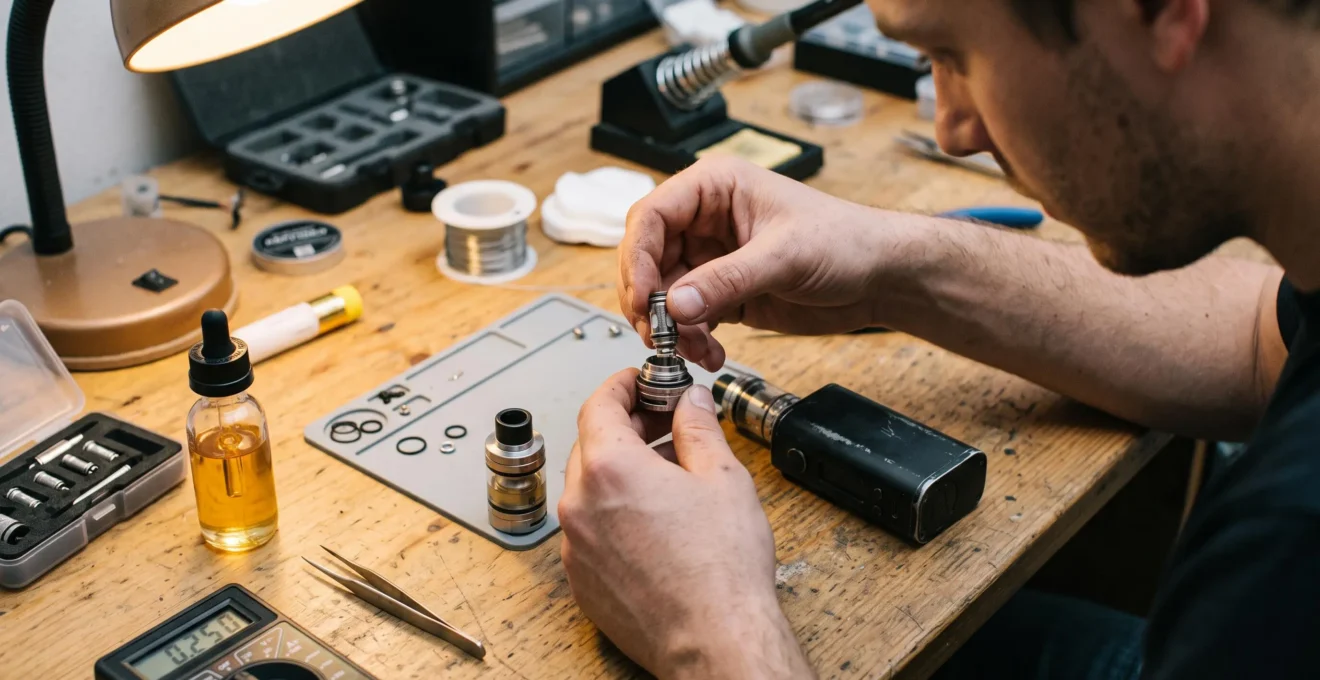
Interchangeable vape components offer a practical way to retain working hardware while replacing a worn coil, fitting another atomiser or changing a tank. However, a component that physically attaches to a device is not necessarily electrically compatible, mechanically suitable or safe to operate.
Successful component swapping requires three separate checks: the connection must match, the electrical requirements must fall within the device’s supported specifications, and the airflow and liquid pathways must work as intended. A mismatch at any one of these points can cause weak vapour production, leaking, connection errors or potentially hazardous electrical faults.
Compatibility also depends on the condition of existing hardware. An ageing battery, worn connector or damaged seal may undermine a replacement component even when its specifications appear correct.
The most reliable approach is to verify the manufacturer’s compatibility information, inspect both components before assembly and treat unexpected resistance readings or physical damage as reasons to stop rather than improvise a fix.
Vape Component Compatibility: The Essentials
- Check beyond physical fit: connection type, coil resistance, supported wattage and airflow must all be compatible.
- Inspect before installing: damaged threads, seals, contacts and unexpected resistance readings can reveal problems before normal use.
- Replace the actual weak point: consumable wear may justify a small replacement, while damaged electrical hardware can make a complete device replacement more appropriate.
- Why Can Two Vape Components Fit Together but Still Perform Poorly?
- How Should You Check a Replacement Vape Component Before Installing It?
- Single Component Upgrade or New Setup: Which Makes More Sense for Ageing Hardware?
- Which Compatibility Warning Signs Mean You Should Stop Fitting a Vape Component?
- Which Vape Component Should You Upgrade First When Performance Starts to Decline?
- Which Compatibility Errors Should You Check Before Fitting a New Atomiser?
- How Can You Check a Vape Device for Mechanical Wear Before Reassembly?
- How Can You Build a Vaping Setup That Matches Your Power and Portability Needs?
Why Can Two Vape Components Fit Together but Still Perform Poorly?
Two vape components can connect securely yet perform poorly because physical fit does not establish electrical or functional compatibility. A matching thread or magnetic attachment only confirms part of the connection. Coil resistance, device output, contact geometry and airflow must also align with the manufacturer’s specifications for the assembled system to operate correctly.
A standard 510 connection illustrates the distinction. An atomiser may screw onto a mod without difficulty, but the device might not support its installed coil’s resistance or recommended wattage. Similarly, a magnetic pod can seat firmly while its contacts, internal airflow arrangement or electronics differ from those expected by the device.
There are three separate compatibility layers to check:
- Mechanical compatibility: connector standard, thread engagement, seating surfaces, physical dimensions and contact positioning.
- Electrical compatibility: coil resistance, recommended operating wattage, device output limits and the manufacturer’s supported resistance range.
- Functional compatibility: airflow routing, liquid delivery, seals and component-specific operating requirements.
An atomiser with restricted airflow paired with a coil designed for substantially greater airflow may produce an unsatisfactory result even when the electrical specifications match. Conversely, a coil may receive insufficient power from an older device, resulting in weak vapour production without generating an obvious error.
Innokin identifies resistance, wattage range and airflow design as important coil characteristics in Innokin’s technical explanation of vape coils. These characteristics must be considered together rather than treating resistance as the only compatibility measurement.
The distinction becomes especially important when comparing regulated and mechanical devices. A regulated mod may detect an unsupported resistance or short circuit and prevent operation. A mechanical mod generally lacks equivalent electronic protections, leaving electrical behaviour dependent on the connected load and battery. A coil’s operation on a regulated device therefore provides no assurance that the same coil is safe on a mechanical device.
Even regulated hardware has model-specific limitations. A device’s control board may reject a working atomiser because of its resistance range, connector behaviour or supported component recognition. Firmware and protection differences between device generations can also affect whether a particular combination operates, although the exact restrictions must be verified for each model.
A secure connection is only the starting condition. The next step is to confirm compatibility through documented specifications and a careful pre-installation inspection.
How Should You Check a Replacement Vape Component Before Installing It?
Before installing a replacement vape component, confirm its exact model compatibility, inspect its physical condition and compare its electrical specifications with those of the device. Check the connector, seals and contacts while the device is powered off. Only proceed with a manufacturer-supported installation and verify normal resistance readings before operating the assembled device.
Begin by identifying the device and replacement component precisely. Similar product names, identical-looking coils and matching connector shapes do not necessarily indicate interchangeable parts. Manufacturer part numbers and compatibility lists are more dependable than appearance alone.
Inspect threads for damaged edges or debris, O-rings for cracking or flattening, and contacts for residue or corrosion. Look for liquid around the connector and check that the replacement sits as intended without forcing it.
For an atomiser or rebuildable assembly, a suitable resistance reader can help identify an unexpected electrical reading before use. For compatible regulated devices, the device’s own resistance display provides an additional check after fitting. Neither reading independently certifies that a component is safe; the measured resistance must agree with the expected specification and remain within the device’s supported range.
When comparing a generic replacement with the original, document visible identifiers, connector dimensions and contact arrangement. A side-by-side photograph can reveal differences in thread length, gasket placement or contact position. Measuring connector diameter and pitch may help identify an unfamiliar part, but those measurements are not a substitute for explicit compatibility confirmation. An uncertain connector or pin depth should never be adjusted experimentally to obtain electrical contact.
After installing a manufacturer-approved coil, follow the specified priming procedure before firing. This normally involves saturating the wicking material, filling the tank and allowing sufficient time for absorption. Where the manufacturer permits adjustable power, begin within the lower end of the stated wattage range and increase only as instructed. Drawing through a newly filled assembly without firing may help assess airflow, but it cannot establish electrical safety.
Innokin’s troubleshooting instructions for coils and tanks describe checking seals and alignment, priming the wick, keeping connectors clean and dry, and gradually adjusting power within the recommended range. Its specified saturation period applies to the procedure described, not automatically to every coil design.
Five Checks Before Installing a Replacement
- Confirm the exact component identity: record the manufacturer, model and compatible device or coil family from official documentation.
- Inspect the mechanical interface: note whether the threads, housing, seals and connection surfaces are intact, clean and correctly shaped.
- Compare electrical requirements: record the replacement’s stated resistance and wattage requirements alongside the device’s supported specifications.
- Check the component’s condition: document any damaged contacts, corrosion, liquid contamination or suspicious manufacturing differences; reject questionable parts.
- Verify the approved installation: confirm correct seating, expected resistance readings and completion of the manufacturer’s priming and initial-use instructions.
Identical-looking replacements from unknown sellers introduce another uncertainty: dimensions alone do not verify internal materials, electrical construction or quality control. A component without traceable specifications should not be assumed equivalent to an original part.
Once installation requirements are clear, the remaining question is whether upgrading an existing device is worthwhile or whether its ageing hardware has become the limiting factor.
Single Component Upgrade or New Setup: Which Makes More Sense for Ageing Hardware?
Replacing one component makes sense when the fault is isolated, the replacement is officially compatible and the remaining device is in sound condition. A complete replacement becomes more appropriate when battery deterioration, damaged connectors, unreliable electronics or discontinued parts undermine the existing hardware. The decision should consider safety, availability and total ownership cost rather than purchase price alone.
A coil, pod, seal or glass section is generally a replaceable consumable or service part. If the device operates correctly and the manufacturer supplies a suitable replacement, exchanging the worn item preserves otherwise functional hardware.
Age-related problems in the device body require a different assessment. Worn spring-loaded contacts, damaged circuit boards, unreliable buttons and deteriorating battery systems cannot necessarily be corrected by fitting another tank or coil.
The practical distinction is whether the issue sits in a replaceable external component or the device’s core power and connection system.
| Assessment | Single Component Replacement | Complete Setup Replacement |
|---|---|---|
| Fault location | Clearly isolated to a compatible consumable or serviceable part | Suspected battery, control board or structural connector failure |
| Part availability | Original or manufacturer-approved replacements remain available | Parts are discontinued, uncertain or require adaptation |
| Electrical condition | Device operates within specification without persistent errors | Unstable readings, unexpected heating or repeated electrical faults |
| Practical cost | Limited replacement expense with no repeated unresolved failures | Recurring purchases and maintenance without dependable operation |
| Long-term compatibility | Supported coil and component ecosystem | Increasing dependence on scarce or unverified components |
One useful financial test is to record what has already been spent replacing parts that failed to resolve the same symptom. Add the expected cost and availability of future consumables. This does not produce a universal replacement threshold, but it exposes when maintaining an obsolete platform is becoming impractical.
Mixed-generation hardware can complicate the calculation. A newer tank may require an operating range that an older mod cannot provide. A newer pod may appear similar to an earlier version while using a different internal connection system. Charging characteristics, control-board features and battery arrangements may also differ between generations, although these must be assessed against the actual product specifications.
Battery ageing deserves particular attention. Reduced runtime and voltage sag can affect performance, making a working coil appear ineffective. However, this symptom alone does not establish battery failure. A swollen, physically damaged, excessively hot or otherwise suspect battery or device must not be used, modified or charged in an attempt to recover performance.
The U.S. Food and Drug Administration acknowledges fire and explosion risks associated with vaping batteries and provides FDA guidance on preventing vape battery fires and explosions. Its recommendations include following manufacturer instructions, using recommended batteries and avoiding mixtures of incompatible battery types or conditions.
Cost matters only when the equipment remains suitable for continued use. Signs of mechanical damage or electrical instability should override the desire to preserve an older setup.
Which Compatibility Warning Signs Mean You Should Stop Fitting a Vape Component?
Stop fitting or using a vape component when assembly requires force, threads bind or cross, contacts fail to align, resistance readings become unstable, or the device reports a short circuit. Unexpected heating, damaged seals and liquid entering electrical areas also justify stopping. These signs require inspection or manufacturer support, not repeated firing or improvised adjustments.
Mechanical warning signs often appear before the device is powered on. A connector that turns smoothly and seats according to the manufacturer’s design differs from one that grinds, tilts or requires increasing force.
Warning signs include:
- Threads catching repeatedly, producing gritty resistance or failing to engage correctly.
- A 510 connector or contact pin that appears bent, damaged or displaced.
- A tank that cannot seat as designed, especially when an unexpected gap accompanies unstable contact.
- A magnetic pod requiring unusual force or sitting visibly misaligned.
- A cracked housing, distorted gasket or connection component that moves unexpectedly.
Not every small gap or snug fitting indicates incompatibility. Some devices intentionally use raised connection surfaces or firm magnetic retention. The distinction should be established by comparison with the manufacturer’s intended fit, not by using greater force. A firm but smooth connection may be normal; binding, scraping or deformation is not.
Electrical warnings require equally careful interpretation. Messages such as « short atomiser », « no atomiser », « ohms too low » or « ohms too high » can indicate contact problems, unsupported coil resistance or electrical faults. The meaning and thresholds vary by device.
SMOK‘s manufacturer troubleshooting FAQ identifies shorted connectors, faulty coils, resistance detection issues and possible circuit-board problems among the causes of firing errors. It does not establish that every warning has the same cause or that a particular displayed reading proves a battery will vent.
Never bypass a protective cutoff or repeatedly activate the device to see whether an electrical fault disappears. If a fault persists after approved non-invasive checks, stop using the affected equipment.
Liquid can introduce a further warning. Pooling around a 510 recess, seepage near electrical contacts or unexpected leakage into the device housing should be investigated before use. Gurgling alone may reflect condensation, excess liquid or coil conditions rather than a definite compatibility error, but it still warrants examining the relevant seals and airflow pathway.
If a device overheats, emits an unusual smell or shows signs of battery damage, discontinue use and follow the manufacturer’s emergency and disposal guidance. Do not dismantle a sealed battery system to investigate it.
When no safety warning is present but performance has gradually declined, a structured diagnosis can help distinguish routine consumable wear from more consequential hardware deterioration.
Which Vape Component Should You Upgrade First When Performance Starts to Decline?
Start with the component most directly associated with the symptom, rather than upgrading the most expensive part. A worn coil or saturated wick is a common candidate when flavour declines, while weak output, leaking or intermittent firing require different checks. Inspect consumables and airflow first, then assess contacts, power delivery and the device body if problems persist.
A practical diagnostic sequence starts with observations that do not require altering the device. Record when the symptom began, whether it affects every compatible coil or pod, and whether any warning messages appear.
Next, consider the consumable elements. A coil approaching the end of its service life can produce declining flavour, inconsistent vapour or a burnt taste. However, insufficient priming, inappropriate wattage and reduced liquid supply can produce similar symptoms. Installing another coil without addressing those conditions may reproduce the failure.
When flavour remains acceptable but vapour output is weak, inspect airflow restrictions and verify that the selected coil’s recommended power range matches the device. Reduced battery performance may be relevant, but it should not be assumed without considering the remaining system.
The following symptom guide helps separate possible causes without treating them as definitive diagnoses.
| Observed Symptom | Possible Cause | Initial Check |
|---|---|---|
| Burnt or deteriorating flavour | Coil wear, insufficient wicking, unsuitable power | Coil condition, priming and recommended wattage |
| Weak vapour with otherwise normal flavour | Airflow restriction, unsuitable output or reduced battery performance | Airflow path, device setting and power-system condition |
| Persistent leaking | Damaged seals, incorrectly seated coil or liquid-path mismatch | O-rings, tank assembly and specified coil compatibility |
| Intermittent activation | Electrical contact fault, coil detection problem or device electronics | Connector condition, error messages and manufacturer guidance |
| Unexpectedly short runtime | Battery deterioration, usage changes or increased power demand | Battery condition and operating requirements |
These symptoms overlap. For example, replacing a coil may temporarily improve performance without resolving unstable electrical contacts. Conversely, replacing a mod would be unnecessary if a damaged O-ring is the only reason a tank leaks.
Upgrading one component can also expose another limitation. A tank designed for greater power consumption may shorten runtime on the existing device or operate poorly if the mod cannot support its intended wattage range. The replacement should be evaluated as part of the complete system rather than in isolation.
A small maintenance record makes recurring problems easier to recognise. Note the installation date, coil model, stated resistance, operating wattage and symptoms observed. Repeated issues across correctly installed compatible consumables may indicate that the device body needs professional assessment or replacement.
Once the diagnosis points specifically toward an atomiser change, the next decision depends on connector geometry, electrical specifications and continued access to the correct coils.
Which Compatibility Errors Should You Check Before Fitting a New Atomiser?
Before fitting a new atomiser, check that its connector matches the mod, its dimensions permit proper seating, and its installed coil operates within the device’s resistance and output limits. Also examine airflow clearance, contact design and replacement-coil availability. A standard connector alone does not guarantee that the complete atomiser will work correctly on a particular device.
The first mistake is assuming every attachment uses the same connection standard. Many conventional tanks use a 510 connector, while pod systems commonly employ proprietary fittings. A magnetic adapter or visually similar connection does not automatically establish cross-brand compatibility.
For threaded atomisers, the mod and atomiser must use matching connection specifications. The centre contact must also engage as intended. An atomiser pin that is too short may prevent reliable electrical contact; an unsuitable protrusion or excessive tightening can damage the device’s connector assembly.
Connector pin position is not an invitation to modify hardware. Unless the manufacturer explicitly provides an adjustment procedure for that exact product, changing pin depth or improvising spacers can create additional risks.
Physical dimensions matter beyond thread fit. A tank wider than the mod’s supporting surface may overhang the body. Overhang is not automatically an electrical incompatibility, but it can leave an assembly vulnerable to impact or interfere with controls and other surfaces.
Check the atomiser’s airflow layout as well. Bottom airflow openings may be restricted by surrounding hardware or raised surfaces. Side airflow and mouthpiece positioning can affect accessibility, handling and comfort. These issues can make an otherwise electrically supported combination inconvenient to use.
Electrical checks remain essential:
- Confirm that the installed coil resistance is within the mod’s manufacturer-supported range.
- Ensure the recommended operating wattage is achievable within the device’s supported settings.
- Verify any model-specific restrictions concerning atomiser type or operating mode.
- Confirm that replacement coils are approved for the precise tank version.
Coil availability is an often overlooked compatibility issue. A tank may operate correctly when purchased yet become difficult to maintain if its coil family is discontinued or poorly supported. Before selecting a replacement atomiser, check whether suitable coils remain available from reliable suppliers and whether their ongoing cost is acceptable.
Where manufacturer compatibility cannot be established, neither a successful initial connection nor a matching displayed resistance is sufficient evidence to proceed.
Even a correctly specified atomiser relies on the condition of the existing mod. Inspecting worn connection hardware before reassembly can reveal faults that no new tank will resolve.
How Can You Check a Vape Device for Mechanical Wear Before Reassembly?
Check a vape device for mechanical wear by inspecting its accessible connector threads, contact surfaces, seals, retaining components and housing before reassembly. Look for corrosion, deformation, looseness, damaged O-rings and evidence of overheating or liquid intrusion. Cleaning should follow the manufacturer’s material-specific instructions, and damaged electrical components should not be repaired through improvised adjustment.
Begin with the device powered off and, where the design permits, any removable battery handled according to manufacturer instructions. Never open a sealed battery enclosure or disturb internal circuitry as part of routine cleaning.
Examine the 510 connection under good lighting. Rounded thread edges, visible metal debris, damaged contact surfaces or an unexpectedly loose connector can indicate mechanical deterioration. A spring-loaded contact that remains recessed or moves abnormally may require manufacturer service rather than manual repositioning.
For compatible pod hardware, inspect accessible contact surfaces and retention points. Corrosion, distorted contacts or weak magnetic retention can interfere with seating and reliable operation. Avoid scraping electrical contacts or attempting to reshape them with metal tools.
Seals require a separate check. Flattened, torn or incorrectly seated O-rings may no longer provide the intended liquid barrier. Examine glass sections and accessible sealing surfaces for cracks, chips and trapped debris.
Cleaning methods must be appropriate for the material and component. Removable, manufacturer-approved washable tank parts may be cleaned using the specified procedure and dried completely before assembly. Electrical connections should remain clean and dry, with cleaning limited to the methods permitted for the device.
Solvents require particular caution. Isopropyl alcohol and specialist contact cleaners are not universally suitable for plastic housings, coatings, adhesive joints or elastomer seals. Material compatibility depends on the formulation and exposure conditions. Do not apply a solvent to electrical assemblies or seals merely because it is commonly used for other electronics.
During reassembly, check that approved seals return to their correct positions and are not pinched between joining surfaces. Engage threaded components carefully and avoid overtightening. Excess force can accelerate wear or damage already weakened threads.
After reassembly, inspect joints for visible leakage using a dry tissue around accessible exterior surfaces, without introducing liquid into electrical areas. Where the device is in sound condition and the assembly is manufacturer-approved, verify that the resistance display remains consistent with the installed coil and that controls and airflow adjusters operate normally. The manufacturer determines the appropriate initial activation procedure.
A stable reading during a brief check does not rule out an intermittent defect. If resistance values change unexpectedly, the device displays an electrical fault, liquid reaches internal components or unusual heating occurs, stop using the equipment.
Once the existing hardware’s condition is understood, future component choices can be planned around a consistent set of power, portability and compatibility requirements.
Key Takeaways Before Planning Your Setup
- Define the required operating range before selecting a tank, coil or device body; connector fit is only one requirement.
- Consider replacement-coil availability and manufacturer support alongside immediate hardware compatibility.
- Choose a configuration that meets everyday handling and battery needs without depending on adapters, forced fitting or unverified component combinations.
How Can You Build a Vaping Setup That Matches Your Power and Portability Needs?
Build a compatible vaping setup by defining the required power range, battery runtime, liquid capacity and carrying requirements before selecting individual components. Then verify that the atomiser, coil and device are approved to work together. A smaller setup prioritises portability, while larger configurations may accommodate greater battery capacity or tank volume, subject to the actual product design.
The central decision is how the device will be used. Someone prioritising minimal carrying weight may prefer a compact manufacturer-supported system, while someone who values longer runtime and replaceable components may accept a larger device. Neither arrangement automatically offers better performance or safety.
Battery capacity, coil operating requirements and liquid consumption are connected. Coils designed for greater power demand may consume more electrical energy and liquid during comparable use, but actual consumption depends on operating settings and usage patterns. Published specifications are more useful than assuming that a particular coil resistance will always deliver a particular runtime.
For a planned modular configuration, assess three practical requirements.
- Power coherence: the installed coil’s stated operating range must fit within the device’s supported output and resistance specifications.
- Daily practicality: battery runtime, liquid capacity, dimensions and weight should suit expected usage without encouraging unsupported charging or battery substitutions.
- Future serviceability: compatible coils, seals and other intended replacement parts should remain available through reliable sources.
The connection ecosystem also affects future upgrades. A device using a widely adopted interface such as 510 may offer more potential atomiser choices, although each combination still requires electrical and mechanical verification. Proprietary pod systems may provide a simpler manufacturer-defined component range but depend more heavily on continued support for that particular product family.
Consider a hypothetical comparison between two manufacturer-supported systems. One uses a compact integrated pod with a limited range of matching replacements. The other uses a larger regulated mod and a compatible replaceable tank. The first may be easier to carry, while the second may offer more options for intended component replacement. Neither is inherently preferable without knowing the user’s portability needs, operating requirements and access to approved consumables.
Before buying an upgrade, compare its published specifications with those of the complete setup. Confirm the connector, coil family, resistance requirements, operating range and physical dimensions. Include manufacturer restrictions and battery or charging instructions rather than judging components independently.
This planning approach also helps avoid a common compatibility mistake: selecting a new atomiser first and only afterwards discovering that the existing device cannot meet its operating requirements.
Write down the exact device model, approved component family, resistance range and relevant manufacturer instructions before the next replacement. Use that reference to select verified parts, and replace or professionally assess hardware whenever its condition makes safe compatibility uncertain.
Can two vape tanks use the same 510 thread but require different operating settings?
Yes. The 510 interface describes a connection arrangement, not a shared electrical specification. Different tanks and coils may require different resistance and wattage ranges. The mod must support the installed coil’s specifications, and the combination must be approved or otherwise explicitly supported by the manufacturers.
Can an adapter make a proprietary vape pod compatible with another device?
An adapter can only establish supported compatibility if it is designed and approved for the exact devices and components involved. Matching physical dimensions does not prove that electrical contacts, device recognition, resistance requirements and airflow will work correctly. Unverified adapters should not be used to bypass proprietary connection restrictions.
Does a matching coil resistance mean that two replacement coils are interchangeable?
No. Coils with the same stated resistance can differ in dimensions, contacts, wicking materials, airflow arrangements and recommended power ranges. A replacement should belong to the correct manufacturer-supported coil family. Resistance is one compatibility specification, not proof of interchangeability.
Should a vape device be used when its resistance reading changes unexpectedly?
No. Unexpected or persistent resistance fluctuations can indicate connection, coil or electrical problems. Stop using the device, follow the manufacturer’s troubleshooting instructions and seek qualified service or replacement if the fault remains. Repeated firing is not an appropriate way to diagnose an unresolved electrical fault.
Is an older vape mod still suitable for a newly released tank?
Possibly, provided the manufacturer-supported connection, resistance range, wattage requirements and physical fit all align, and the older device remains in sound condition. The release date alone does not determine compatibility. Age-related battery or connector deterioration may make a replacement device preferable even when the tank’s specifications appear compatible.